Squeaky and Creaky: Common Bike Noises
You’re on a long ride, cranking up a hill. Heart pumping, legs strong, totally in the zone. Except for those creaks and squeaks coming from your bike. Those bike noises are more than annoying – they’re your bike crying for help! Here’s how to diagnose common bike noises.
 There’s good news: you and your bike don’t have to suffer! It can take some time to hunt down and diagnose your bike problems. But as you go through these fixes, you’ll eventually find the cause of your aggravation. You’ll have a cleaner, quieter, smooth-riding bike thanks to your hard work!
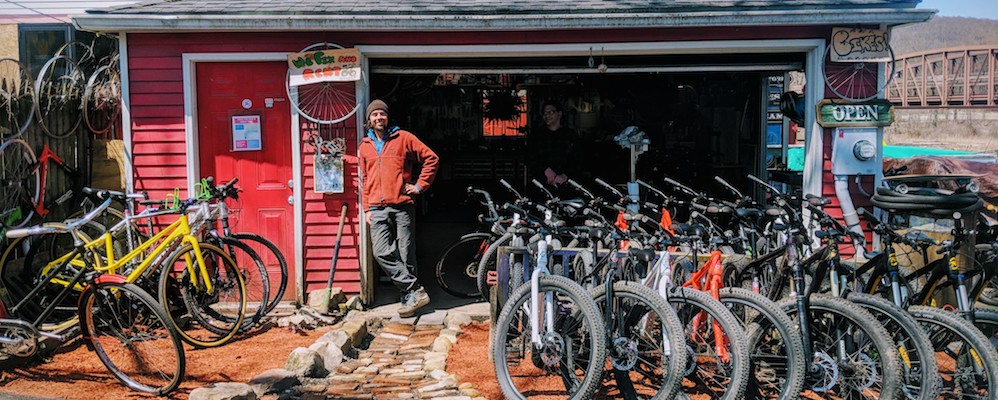
(If you live in the Ohiopyle area, our Ohiopyle bike shop is equipped to handle any repair! Give them a call if you have any questions.)
Below are the primary causes of common noises while you ride:
Squeaks and Creaks:
These super common sounds are usually due to DIRTY or DRY bearings. You’ll often find that after riding your bike for a while or in harsh conditions these noises start to creep in. Check these areas for dirt, grime, or dried-out grease:
- Crankset/ Bottom Bracket
- Headset
- Pivots (only on a mountain bike with rear suspension)
- Derailleur jockey wheels or chain guide pulleys
- Chain
- Derailleur “clutch” or lockout area
- Saddle rail clamp bolt
- Clipless pedals
If any of these parts are dirty, give them a good wipe-down with a shop rag and a gentle cleaner like Simple Green. Then, if your issue is a rusty chain, dry bottom bracket, or dry headset bearings, re-lubricate with either chain lube (for your chain) or some grease.
Clunks and Clatters:
Another common, more serious, noise is a clunk or clatter. Pay attention if your bike makes these noises! It usually means there’s something loose. Here are some important bolts to check if you hear this noise:
- Headset
- Front/Rear wheel axles
- Pivots (only on a mountain bike with rear suspension)
- Derailleur bolt
- Water bottle cage (not really a big deal, but you don’t want to lose this on a ride!)
Scraping and Popping:
Likely the most common of all the annoying bike noises, scraping and popping usually occurs when there’s an issue with your derailleur or shifting. Before adjusting your limit screws and cable tension, check these issues first:
- Rear wheel axle (make sure it’s tight!)
- Derailleur bolt (make sure it’s tight!)
How to Maintenance Bike Noises
Clean and Re-grease Bottom Bracket Bearings. Your cranks are under lots of pressure to propel you forward, so the bearings that help them spin easily are pretty important. Being close to the road or trail surface, debris flings itself into the space between your chain ring and the frame and eventually, dirt and grime are going to find its way into the bearings and create all sorts of nasty noises while you ride. Periodically, and especially if you ride in wet or muddy conditions, removing your cranks, cleaning and re-greasing your bottom bracket bearings is necessary.
Check to make sure your cranks are tightened to the proper torque specifications. If your cranks are loose, sometimes they will make popping or creaking noises. If your cranks feel tight, follow the steps below. Make sure you have the correct tools before you begin this project, or take your bike in to your local shop to have this process done.
- Remove your chain from the chain ring by loosening the tension on the derailleur.
- With the chainring/ cranks free and no chain tension, remove the cranks. Depending on the make/model of your cranks you may require a specific “crank puller” tool.
- Once you have removed the cranks, be sure to keep any washers or spacers in the proper order and remove them from the crank spindle.
- Wipe the crank spindle free from dirt and grime. Also, remove dirt and grime from the bearings and seals.
- Re-grease the crank spindle as well as the bearings before replacing the seal.
- Replace the washers and spacers in the correct order and reinsert the crank into the bottom bracket.
- Align the other crank with the spindle and tighten to proper torque spec.
- Replace your chain, and you’re done.
Check the Headset. Another common source for creaks, clanks, and rattles is the headset. If you are experiencing noise in the front of the bike as you go over obstacles in the trail on rough roads, it could be a sign that you need to either tighten your headset or clean and re-grease the headset bearings, which often get contaminated with dirt.
Tightening a loose headset:
- First make sure your headset is tight enough. Turn your handlebars to the side so that your wheel is pointing to the left or right. Then squeeze the front brake with your left hand and place your right hand on the bottom of the head tube where the fork meets the frame. Push forward. Does your bike move back and forth? Can you feel your fork moving inside the frame?
- If so, loosen your stem bolts (equally and evenly, one at a time).
- Tighten your headset bolt (the top bolt on the cap).
- Lift the front of the bike and let the front wheel swing one way and then the other. If this motion isn’t smooth, then the headset is too tight.
- Make sure your handlebars are straight, then tighten the stem bolts again, equally and evenly until you reach proper torque spec.
Clean and Re-grease your Headset Bearings If your headset is tight and you’re still experiencing creaking or clunking, follow these instructions to clean and re-grease the bearings:
- Loosen stem bolts, equally and evenly until loose.
- Remove headset bolt, headset top cap, and stack spacers in the order in which you take them off your bike.
- Pull stem up and off of the steer tube of the fork.
- Stack any remaining spacers separately from the spacers on top of your stem.
- Pull the fork’s steer tube out of the head tube of the bike, holding one hand on the bottom of the head tube to ensure the bottom headset bearings do not fall on the floor.
- Place the fork aside and wipe the headset bearings free of any dirt and grime, using a clean rag. Also, wipe the inside of the head tube and any spacers and seals.
- Wipe the fork’s steer tube and crown race free from dirt.
- Re-grease the headset bearings where the bearings rotate on the crown race and top seals, as well as where the headset bearing fits into the headset itself.
- Re-insert the fork into the head tube and replace the seal, spacers, stem, top spacers, and headset cap.
- Tighten the headset until there is no play in the steer tube and the handlebars turn freely with no binding or grittiness.
- Straighten the handlebars and tighten the stem bolts equally and evenly until tightened to the proper torque specifications.
Clean and Re-grease your Drivetrain. Consistent squeaking coming from your drivetrain could be a couple of different issues, but each involves making sure moving parts are well lubricated or greased.
First make sure your chain is clean and well-lubed. If your chain is dry, dirty, or rusted, the rollers could bind up and cause squeaking or jumping over teeth in your cassette. If your chain seems to be moving freely, then it could be dirty, or the bearings in your derailleur jockey wheels (or chain guide pulley) could be seizing up. Fix this by following these instructions:
- Remove the chain from the chain ring.
- Holding the chain away from the pulleys, spin each one and check for any binding or crunching. If the pulleys are spinning freely, don’t go any further because they’re fine!
- Using an Allen wrench, loosen and remove the pulley bolt. Remove the pulley from the derailleur and replace the pulley bolt so you don’t lose it.
- Wipe the outside of the pulley with a clean rag to remove dirt and grease build-up.
- Use a pick to lift the bearing seals in the middle of the pulley on both sides.
- Wipe away any visible dirt. With the bearings exposed, spray a “speed” degreaser, or any degreaser that doesn’t require washing onto the bearings. Let it sit for 5 minutes and dry with a clean rag.
- Repack the bearings with plenty of grease before reinstalling the bearing seals by pushing them into place with your fingers.
- Holding onto the seals, spin the pulley to ensure it spins freely without any sticking or grinding.
- Replace the pulley into the derailleur and tighten the pulley bolt to proper torque spec.
Some important notes!
*Tightening bolts to proper torque specifications using a torque wrench is the best way to ensure bolts do not get stripped, components don’t break from over-tightening, and everything stays tight while riding.
**There are lots of different reasons your bike could be making squeaks, squeals, creaks, pops, and clunks. These are just a few common issues you could experience and how to fix them. Always take your bike to a local shop if you have any hesitations with working on your own bicycle.
![]() Wilderness Voyageurs runs fully-supported bicycle tours. All Wilderness Voyageurs tours are fully supported with a SAG vehicle and include beautiful routes through stunning landscapes, with excellent food and accommodations, top rate equipment and dedicated and enthusiastic guides.
Wilderness Voyageurs runs fully-supported bicycle tours. All Wilderness Voyageurs tours are fully supported with a SAG vehicle and include beautiful routes through stunning landscapes, with excellent food and accommodations, top rate equipment and dedicated and enthusiastic guides.
Give our reservation staff a call to book your next bike tour vacation. (800) 272 – 4141
Wilderness Voyageurs
103 Garrett Street
Ohiopyle, PA 15470